
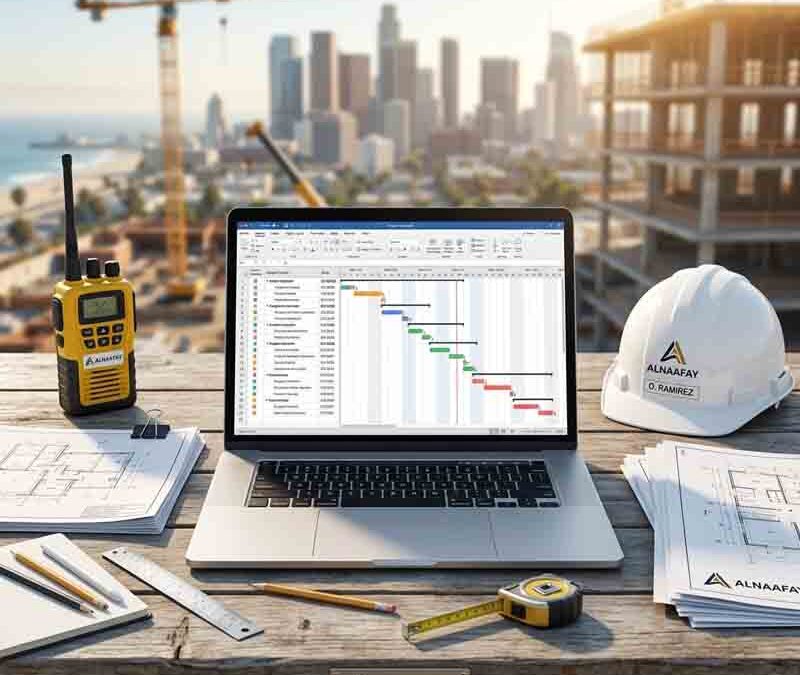
The Critical Path Method Explained for Construction Projects
Construction projects rarely run on schedule by accident. They finish on time because someone identified which tasks truly control the timeline and managed them closely. The Critical Path Method is the tool that makes this possible. It pinpoints the exact sequence of activities that determine your project's completion date, so you know where to focus your attention, your crews, and your equipment.
In this guide, we break down the Critical Path Method in plain language, built specifically for construction. You will learn what it is, why it matters on the jobsite, the key terms you need to know, and how to calculate the critical path step by step. We also cover the common mistakes that trip up teams, the software that does the heavy lifting, and practical tips for getting real value out of the method. Each section builds on the last, so you can apply what you learn directly to your next project.
Table of Contents
- What Is the Critical Path Method?
- Why the Critical Path Method Matters in Construction
- Key Terms in the Critical Path Method
- How to Calculate the Critical Path in Construction Projects
- Step-by-Step Guide to Applying the Critical Path Method
- Common Mistakes When Using the Critical Path Method
- Tools and Software for the Critical Path Method
- Tips for Getting the Most Out of the Critical Path Method
- Conclusion
- FAQs
1. What Is the Critical Path Method? {#what-is}
The Critical Path Method is a scheduling technique that identifies the longest sequence of dependent tasks in a construction project. This sequence determines the shortest possible time in which you can complete the job. Put simply, the method finds the chain of activities that controls your finish date.
On any jobsite, dozens of tasks happen at the same time. Crews may pour concrete in one area while framing goes up in another and electrical rough-in begins somewhere else. However, not every one of these tasks holds equal weight. Some can slip a few days without affecting the project, while others delay the entire build the moment they fall behind. The Critical Path Method separates the two so you always know which tasks demand your attention.
Two elements sit at the heart of this method. Together, they help you see and calculate your schedule:
- The critical path diagram: A visual chart, also called a network diagram, that shows every task, its duration, and how each task connects to the others.
- The critical path calculation: A set of forward and backward passes through the schedule that pinpoints which tasks have zero room to slip.
The method works best on projects where the tasks are familiar and the durations are easy to estimate. Because construction teams usually have direct experience or historical data on activities like framing, roofing, and drywall, they can predict durations with reasonable confidence. For tasks with more uncertainty, you can pair the Critical Path Method with other techniques, such as the Program Evaluation and Review Technique, to build more realistic time estimates.
2. Why the Critical Path Method Matters in Construction {#why-it-matters}
Construction projects are complex by nature. A single job can involve dozens of crews, multiple subcontractors, overlapping tasks, and tight deadlines. The Critical Path Method cuts through that complexity by showing you exactly which steps control the schedule, so you can direct your resources where they matter most.
The cost of getting scheduling wrong is well documented. Research from McKinsey found that 98 percent of large construction projects face cost overruns or delays. The root cause almost always traces back to weak scheduling. A clear critical path is one of the most effective defenses against joining that statistic, because it tells you precisely where a delay will hurt and where you have room to maneuver.
Here is how the Critical Path Method delivers value across your project:
- Smarter resource allocation: The method identifies which tasks directly affect your completion date. You can then prioritize labor, equipment, and materials for those critical activities instead of spreading resources thin.
- Better task sequencing: It maps every dependency, so each task happens in the right order with minimal downtime. When one task finishes, the next can start without confusion.
- Accurate progress tracking: Because you know which tasks are critical, you can monitor them closely, catch bottlenecks early, and forecast completion with confidence.
- Stronger delay management: When problems arise, the critical path shows the severity at a glance. You can decide quickly whether to request more time, add resources, or adjust the sequence.
- Support for contracts and disputes: Many owners require a critical path schedule before work begins. Courts and claims consultants often use it to assess responsibility when delays occur.
These benefits explain why the Critical Path Method is one of the most common planning techniques in construction. Even when it is not your personal go-to, you will almost certainly encounter it on other people's projects, so understanding it is essential.
Logistics offer a clear example of the method in action. When a long-lead item like custom glass sits on the critical path, that tells you to place the order early. When a crane is needed for a task with no slack, you book it first. Rather than scrambling to react, you plan ahead with a clear picture of what depends on what.
3. Key Terms in the Critical Path Method {#key-terms}
Before you can calculate a critical path, you need to understand the vocabulary behind it. Each of these terms describes a specific piece of the scheduling puzzle. Once you know them, the calculations that follow become far easier to grasp.
Here are the core terms used throughout the Critical Path Method:
- Task (activity): A specific, measurable unit of work, such as "frame exterior walls" or "install rough electric." Keep each task small enough to schedule and track on its own.
- Dependency: A relationship where one task cannot start or finish until another is done. For example, you cannot start framing until the slab is poured and cured.
- Duration: The time required to complete a task, usually measured in days or weeks. Every task in your schedule should use the same unit of time.
- The critical path: The longest continuous chain of dependent tasks with zero float. This sequence sets your project's finish date.
- Float (slack): The amount of time a task can be delayed without pushing back the project's end date. Tasks on the critical path have zero float.
- Earliest start (ES) and earliest finish (EF): The soonest a task can begin and end, based on when its preceding tasks are complete.
- Latest start (LS) and latest finish (LF): The latest a task can begin and end without delaying the project.
- Network diagram: A visual chart, also called a critical path diagram, where boxes represent tasks and arrows represent dependencies.
- Forward pass and backward pass: The two calculation passes through the schedule. The forward pass finds the earliest dates; the backward pass finds the latest dates.
There are four kinds of dependencies you will encounter when sequencing tasks. Each one defines a different relationship between activities:
- Finish-to-Start (FS): Task B begins after Task A finishes. This is the most common type in construction.
- Start-to-Start (SS): Task B can start once Task A starts.
- Finish-to-Finish (FF): Task B must finish when Task A finishes.
- Start-to-Finish (SF): Task B must finish before Task A starts. This type is rare.
Most construction schedules rely on Finish-to-Start and Start-to-Start relationships. Keeping your dependency logic simple makes the schedule easier to build, read, and maintain.
4. How to Calculate the Critical Path in Construction Projects {#how-to-calculate}
Calculating the critical path comes down to four pieces of information for every task: the earliest start, the earliest finish, the latest start, and the latest finish. Once you have those four values, the float falls out of the math, and the critical path reveals itself. Let's walk through how this works using a simple example.
Imagine you are scheduling the interior work for an office building. You have already poured the foundation, and now you need to complete the following tasks before the next milestone:
- Frame exterior walls
- Frame the roof
- Install windows and doors
- Install the roof membrane
- Install rough electric
- Install insulation
- Install drywall
The Forward Pass
The forward pass moves through your schedule from left to right, calculating the earliest each task can start and finish. A task's earliest start depends on when its preceding tasks finish. Its earliest finish is the earliest start plus its duration.
Here is how the math plays out. Say framing the exterior walls can start on day 10 and takes five days. The earliest it can finish is day 15. Framing the roof cannot begin until the walls are done, so its earliest start is day 15, and with a two-day duration, it finishes on day 16. From there, three tasks can begin at once: the roof membrane, windows and doors, and rough electric. Each has an earliest start of day 17, and each finishes based on its own duration.
Insulation cannot start until rough electric is complete, which gives it an earliest start of day 21 and an earliest finish of day 23. Drywall, in turn, waits for insulation, windows, doors, and the roof membrane to all finish. Even though some of those tasks finish earlier, insulation is the holdup, so drywall cannot start until day 24. With a six-day duration, the earliest this segment can finish is day 29.
The Backward Pass
The backward pass reverses direction. Starting from the project's finish date, it moves right to left to calculate the latest each task can start and finish without delaying the job. A task's latest finish equals the latest start of the task that follows it. Its latest start equals the latest finish minus its duration.
In our example, drywall must finish by day 29, so its latest start is day 24. For drywall to begin on day 24, the roof membrane, windows and doors, and insulation must all finish by day 23. Working backward through each task, you fill in the latest start and finish for the entire chain.
Calculating Float and Finding the Critical Path
Once you have all four values for each task, finding the float is simple. You subtract the earliest start from the latest start, or the earliest finish from the latest finish. Both calculations give the same result:
- Float = Latest Start − Earliest Start
- Float = Latest Finish − Earliest Finish
A task with zero float is critical, because it has no room to slip. In our example, rough electric has zero float, so it must start on day 17 and finish on day 20, or the next task falls behind. Windows and doors, by contrast, has a float of four days, which means it can start any time between day 17 and day 21 without causing a delay.
The critical path is the longest connected sequence of tasks with zero float. When you complete the passes correctly, this path reveals itself. One useful check: two tasks running at the same time cannot both have zero float, so if your math shows that, review your work.
5. Step-by-Step Guide to Applying the Critical Path Method {#step-by-step}
Now that you understand the calculation, here is the full process from start to finish. Following these steps in order produces a schedule you can trust on the jobsite. Skipping ahead weakens the entire plan, so work through each one carefully.
Step 1: Identify Every Task
Start by listing all the tasks involved in the project or project segment. The cleanest way to do this is with a work breakdown structure, which organizes the full scope of work into phases, deliverables, and individual work packages. Every task should be definable and measurable, so you can schedule and track it on its own.
Step 2: Sequence the Tasks in Order
Next, arrange the tasks based on their dependencies. For each task, ask three questions: What must happen before this task? What can start after it? What can run at the same time? Then place the tasks in order, connecting them with arrows to show the flow of work. Align tasks that can run concurrently so you can see your parallel workstreams clearly.
Step 3: Estimate the Duration of Each Task
Now assign a realistic time estimate to every task. Use historical data from past projects, supplier lead times, and input from your crews and subcontractors. Keep the unit of time consistent across all activities, whether you measure in days or weeks. For tasks with a lot of uncertainty, the Program Evaluation and Review Technique can help you build a more reliable estimate.
Step 4: Build the Critical Path Diagram
With your tasks and dependencies mapped, draw the network diagram. Use boxes to represent each task and arrows to show how they connect. This visual lays out the full sequence at a glance and helps your team spot where things might go off track before they do.
Step 5: Run the Forward and Backward Passes
Calculate the earliest start and finish for each task by moving forward through the diagram. Then reverse direction and calculate the latest start and finish by moving backward. These two passes give you the four values you need to measure float and identify your critical path.
Step 6: Calculate Float and Identify the Critical Path
Subtract the earliest dates from the latest dates to find the float for each task. Any task with zero float sits on the critical path. Trace the longest connected chain of these zero-float tasks, and you have identified the sequence that controls your project's completion date.
Step 7: Plot the Schedule and Monitor It
Finally, plot your schedule on a Gantt chart, which turns your task list into a clear timeline. Most software highlights the critical path in a different color, so your team can see what matters most at a glance. From here, treat the schedule as a living document. Update it regularly, recalculate the critical path as conditions change, and keep your crews informed.
6. Common Mistakes When Using the Critical Path Method {#mistakes}
Even experienced teams make errors with the Critical Path Method, and these mistakes can quietly undermine an otherwise solid schedule. Knowing them in advance is the best way to keep your plan reliable. Below are the most common pitfalls and how to handle each one.
- Inaccurate task estimates: The method depends on realistic durations and clear dependencies. When estimates are off or the logic is incomplete, the critical path will not reflect reality, and you may end up prioritizing the wrong tasks.
- Treating the schedule as one-and-done: Construction never goes exactly according to plan. If you build the schedule once and never revisit it, the critical path drifts away from what is actually happening on site. Update it regularly instead.
- Assuming the critical path never changes: The critical path is dynamic, not fixed. A shift in durations, a delay, or a change in resources can create a ripple effect that makes a different sequence critical. Watch for these shifts continually.
- Overcomplicating the plan: On large jobs, it is easy to build a schedule with hundreds of activities that no one on the field actually reads. A schedule should guide the work, not bury it in detail. Keep it as clear as the project allows.
- Ignoring near-critical tasks: Tasks with very little float can become critical the moment they slip. If you only watch the zero-float tasks, you may miss a near-critical task that is one bad day away from delaying the whole job.
- Overdepending on software: Tools calculate float and draw diagrams automatically, but they cannot tell you whether your logic is sound or your data is current. Stale or incorrect inputs produce a confident-looking schedule that is simply wrong.
- Ignoring resource limits: Your diagram might show two critical tasks running in parallel, but if both need the same crew or crane, that plan is not feasible. Always check the schedule against the resources you actually have.
The common thread across these mistakes is a loss of trust. Once a schedule stops matching reality, crews stop relying on it, and decisions turn reactive instead of planned. Avoiding these pitfalls keeps your critical path credible and your team aligned around it.
7. Tools and Software for the Critical Path Method {#tools}
You can calculate a critical path with pen and paper, and working through it by hand is a great way to learn the logic. On a real construction project, however, software does the heavy lifting. The right tool builds your schedule, calculates the critical path automatically, and updates it as conditions change. Here are the tools you are most likely to use.
- Primavera P6: This is the industry standard for large, complex projects. It handles detailed task relationships, calendars, resource management, and critical path calculations, which is why major contractors and government agencies rely on it.
- Microsoft Project: More approachable than P6, this tool suits mid-market projects well. It supports Gantt charts, task assignments, and critical path scheduling, and it shares data easily across teams.
- Construction-specific platforms: Tools like Procore and Smartsheet build scheduling into a broader construction management system, with mobile access so crews can see updates from the field.
- Excel: Many teams still use spreadsheets for simple schedules and look-ahead planning. Its limits show on complex jobs, though, where float calculations, logic integrity, and version control become hard to manage by hand.
Several visual tools also support the method and help your team see the schedule clearly:
- Gantt charts: The most common scheduling view, showing each task's start date, end date, duration, and dependencies on a single timeline. Most tools highlight the critical path here.
- Network diagrams: These map the sequence of tasks and their dependencies, which makes them ideal for visualizing the critical path during planning.
- Look-ahead schedules: Covering the next two to six weeks, these short-term plans help you spot and clear constraints before tasks enter the active schedule.
When choosing a tool, match it to your project's size and complexity. A small residential build may need nothing more than a simple scheduling app, while a large commercial project calls for full-featured software. Whatever you choose, look for features that fit how your team actually works, including mobile access in the field and the ability to integrate with your other systems.
8. Tips for Getting the Most Out of the Critical Path Method {#tips}
Building a critical path is only half the job. The real value comes from using it well throughout construction. The teams that consistently deliver on time are not the ones with the most complex schedules; they are the ones who manage the schedule with discipline. Follow these tips to get real value from the method.
- Keep the schedule current: The Critical Path Method only works when the data is fresh. Update progress weekly on active jobs, and recalculate the path each time. Delays, weather, scope changes, and inspections can all shift which tasks are critical.
- Watch the near-critical path: Tasks with very little float can turn critical fast. Monitor activities with minimal slack just as closely as your zero-float tasks, since they are often one slip away from becoming your biggest risk.
- Plan collaboratively: Bring field supervisors, subcontractors, and estimators into the planning process. They catch overlaps and problems that a scheduler working alone might miss, and their buy-in leads to better use of the schedule later.
- Use float strategically: When one crew falls behind on a critical task and another has slack, shift resources to recover time. A clear view of float shows you exactly where you can pull help without affecting the finish date.
- Stay flexible on long jobs: You do not need to plan every detail up front. Build a detailed schedule for the next 30 to 90 days, and keep later phases at a higher level until you get closer. This rolling approach keeps the plan realistic.
- Match the schedule to reality: If your logic shows two tasks running in parallel but they share the same crew or workspace, that plan will not hold. Adjust the logic to reflect the real constraints on your site.
- Make the schedule visible: A simplified version posted on site or shared digitally helps everyone stay aligned. Highlight the critical tasks so crews understand which work cannot slip. A schedule buried in one person's software drives no decisions.
The teams that handle scheduling best are the ones updating often enough to see problems before they hit. Consistent discipline, applied week after week, is what keeps your critical path useful and your project moving toward an on-time finish.
9. Conclusion {#conclusion}
The Critical Path Method is one of the most valuable scheduling tools in construction. It identifies the exact sequence of tasks that controls your completion date, so you know where to focus your crews, your equipment, and your attention. We have covered what the method is, why it matters on the jobsite, the key terms behind it, and how to calculate the critical path step by step.
The core lesson is straightforward. Projects rarely finish on time by luck. They finish on time because someone identified the critical path, managed it closely, and kept the schedule current as conditions changed. When you list your tasks clearly, sequence them logically, estimate durations honestly, and run the passes correctly, the Critical Path Method gives you a plan your whole team can trust.
Use this guide as your foundation. Build your task list, map your dependencies, calculate your float, and identify the critical path before work begins. Then treat that schedule as a living document, updating it on a steady cadence. Handled this way, the Critical Path Method gives your construction project its best chance to finish on time and within budget.
10. FAQs {#faqs}
What is the Critical Path Method in construction?
The Critical Path Method is a scheduling technique that identifies the longest sequence of dependent tasks in a project. That sequence determines the shortest possible time to complete the job. Because the critical tasks have no float, any delay to one of them pushes back the entire project's finish date.
How do you calculate the critical path?
You calculate four values for every task: the earliest start, earliest finish, latest start, and latest finish. A forward pass through the schedule finds the earliest dates, while a backward pass finds the latest dates. You then subtract to find each task's float, and the chain of zero-float tasks forms your critical path.
What is float in the Critical Path Method?
Float, also called slack, is the amount of time a task can be delayed without pushing back the project's finish date. You find it by subtracting the earliest start from the latest start. Tasks on the critical path have zero float, which means they have no room to slip.
Why is the Critical Path Method important in construction?
Construction projects involve many overlapping tasks, and not all of them affect the schedule equally. The method shows which tasks control the finish date, so you can prioritize resources, track progress, and manage delays effectively. Given that 98 percent of large projects face overruns or delays, this clarity is a powerful advantage.
Can I use the Critical Path Method with other scheduling techniques?
Yes. The Critical Path Method works well alongside other methods. For tasks with uncertain durations, the Program Evaluation and Review Technique helps build probabilistic estimates. Many teams also pair the method with pull planning to confirm that the sequence and durations match field reality.
What software is best for the Critical Path Method?
Primavera P6 is the industry standard for large, complex projects, while Microsoft Project suits mid-market work. Construction platforms like Procore and Smartsheet build scheduling into a broader management system. Excel still serves simple schedules. The right choice depends on your project's size and complexity.
Does the critical path stay the same throughout a project?
No. The critical path is dynamic, not fixed. A change in task durations, a delay, or a shift in resources can make a different sequence of tasks critical. This is why you should recalculate the critical path every time you update the schedule, so it always reflects current conditions.
